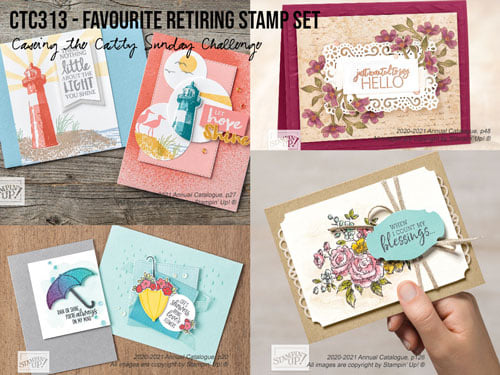
CASE your favourite Retiring Annual Catalogue Stamp set:
Sunday, 11 April 2021
#CTC313 Favourite Retiring Stamp Set
CASE your favourite Retiring Annual Catalogue Stamp set:
Saturday, 27 March 2021
Social Stamping - In Colours
Not sure where the month has gone, but we're back Social Stamping with Kelly Kent and friends with our theme this month using "In Colours".
Given the 2019-2021 In Colours are soon to retire, I thought I would use that set today, but I will share a card I've made previously for a Challenge using the 2020-2022 In Colours further down.
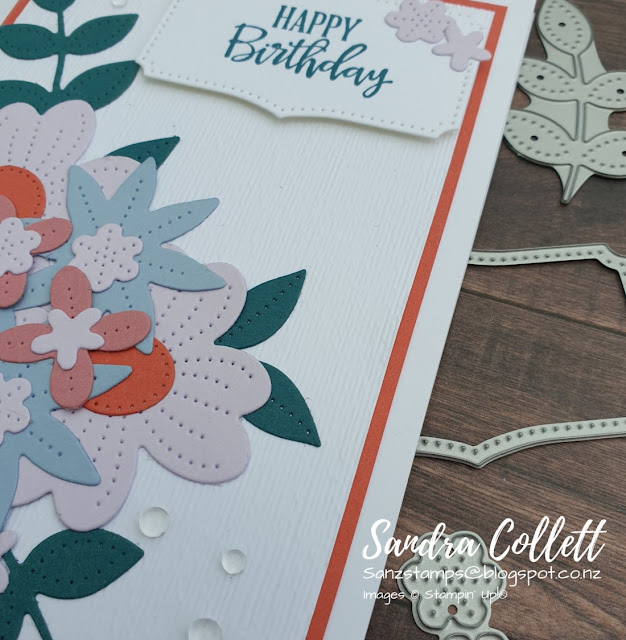
Using Pieced Blooms Dies, I've cut several leaves from Pretty Peacock, and petals in Purple Posy, Rococo Rose and Seaside Spray with some circle centres from Terracotta Tile. To make it easy to put them together I stuck them all to Adhesive sheet and then randomly constructed my flowers.
I've used a base of Thick Basic White and a top layer of Basic White which I embossed with the (sadly) soon to be retired Subtle 3D Embossing Folder. I've layered the embossed piece onto a mat of Terracotta Tile and adhered it to the base card. Then I've popped all the flowers and leaves into place, it's a bit busy and not colours I'd usually use for flowers.
Next I've added a greeting from Peaceful Moments in Pretty Peacock and diecut with another of the Pieced Blooms dies. A couple of flowers added to the corner and popped onto the card with Stampin' Dimensionals. To finish I've popped a few of the clear Flowers for Every Season Gems into place.
The layers of flowers are balanced with the depth of the greeting:
As mentioned, I have used the 2020-2022 In Colours for a Challenge some time ago and I shall share it here for a totally different way to use the In-colours. If you want further detail, you can find it on my original post.
I'm looking forward to seeing everyone's ideas today.
Next up we're hopping over to Mandy:
If you get lost along the way, you'll find all the participants back on Kelly's post here. Thanks again Kelly for your time and energy organising our Social Stamping get togethers.
Sunday, 29 November 2020
#CTC296 Step Up a Mini Catalogue Project
#CTC296 Step Up a Mini Catalogue Project.
I've chosen the card on the left of Pg 28:
I've started with a basic card using stamps, ink and paper along with a punch... relatively #simplestamping. I've chosen Prized Peony for the images and Beautiful Friendship for the greeting. Each card has a 3" wide strip of Peony Garden DSP added to the right hand side.To ensure all my images looked the same, I've punched blanks using the Rectangular Postage Stamp punch and Whisper White cardstock. On the Stamparatus plate I've placed a piece of card with the negative remaining and secured it with the magnets then inserted each 'blank' in with the stamp of choice using Gray Granite ink.
Next I've stepped it up with a touch of colouring using Petal Pink and Light Daffodil Stampin' Blends but only colouring the shaded area and not the whole flower. A piece of Petal Pink Organdy Striped Ribbon under the greeting and some Flowers for All Seasons gems
My next step up I've coloured all of the flower image with the same colour Stampin' Blends. I've added a strip of Forever Gold Specialty DSP along the edge of the Peony Garden DSP, and a small piece of foliage in the centre under the greeting. Each image has been embossed using the Subtle 3D Embossing Folder. The Organdy ribbon has been folded and stuck to the back of each embossed shape before being added in place using Stampin' Dimensionals. The same Flowers for All Seasons gems to finish.
Sunday, 15 November 2020
#CTC294 CASE the Colours of the Cards on Pg 18 Annual Catalogue

Case the colours of the Cards on page 18 - Gray Granite, Blushing Bride, Whisper White, Mint Macaron, Soft Sea Foam, Petal Pink.
Onto a base of thick Whisper White cardstock, I've added a full width panel of Gray Granite Peony Garden DSP. Next I've trimmed a piece of Blushing Bride cardstock to fit on the lower half of my card using a pencil to mark where my die will sit and stamped the greeting from Quite Curvy in Gray Granite ink. I've embossed this with the Subtle 3D Embossing Folder and trimmed it to fit the full width of the card and stuck it in place
I've stamped the leaf image from Quite Curvy in Mint Macaron ink onto Soft Sea Foam cardstock and then coloured with Mint Macaron and Soft Sea Foam Stampin' Blends. I've diecut the image using the matching shape from Curvy Dies - this bundle is now available to purchase along with a co-ordinating Christmas stamp set and DSP.
I've adhered the shape over the join. Next I've used Gray Granite ink to stamp the three bird images and coloured with Gray Granite and Petal Pink Stampin' Blends. I've also diecut these with the same Curvy Dies and adhered them over the leaves. The birds and leaves have been polished with Wink of Stella.
I toyed with leaving the bottom blank but in the end added a few rhinestones.
The crew would love to see what you create using the colours listed, just use the link to post your photograph to our Facebook page before next Sunday evening. Next up we have our friend Rebecca:
Saturday, 30 May 2020
Social Stamping - Hearts
Back with Kelly Kent's Social Stamping Blog Hop and the Covid theme of "Hearts".
If you'd like to check out the previous themes other blog hops telling a different part of the Covid story each week, click on Kelly's name above.
Hearts isn't something I use a lot of when stamping but last week I used the Puzzle Pieces dies for another challenge and had a bit of fun, so I thought I'd do something different with them using the heart shaped puzzle die.
.
I chose some of the Brights Collection colours and cut a heart from Bermuda Bay, Daffodil Delight, Melon Mambo and Pacific Point. I've run each through a different embossing folder and pieced them all together.
Bermuda Bay - Country Floral 3DTo make my life easier and because I didn't think I'd need adhesive sheets, I've punched a 1" circle and adhered each puzzle piece to it to hold them together - (mental note use adhesive sheet next time!!). I've added all my hearts to a square of Whisper White which I've matted with Basic Black. My greeting is stamped in Memento Black ink from Peaceful Moments. I think it suits Kelly - "you shouldn't have, but I'm so glad you did" get us all together social stamping. And the good news is - she's extending the hop for another month, so keep checking back to see what everyone's up to.
Daffodil Delight - Ornate Floral 3D
Melon Mambo - Bricks & Mortar 3D
Pacific Point - Subtle 3D
The gold heart in the centre is a sticker from the Painted Love Gold Vinyl Sticker pack. I recently picked these up in the Clearance Rack and I believe as at today they are still there if they interest you. This was my first time using them and luckily for me, when I accidentally dropped it, the placement worked as it wasn't planning on moving!
To add a bit of a twist, I've punched some of the hearts from the retired Confetti Hearts Border punch and added one to each of the Melon Mambo sections.
To finish I've diecut a Rectangle Stitched die from Bermuda Bay cardstock, snipped it in half and adhered to the back of the matted square, then added it to a base card of thick Whisper White.
Thanks for stopping by, next up we have my friend Michelle from CASEing the Catty Sunday Challenge: #keepstamping everyone! 😊
Thursday, 14 May 2020
Daisy Inspiration
We all enjoy a discount, so don't look past the Daisy Lane stamp set bundled with the Medium Daisy Punch (pg 23 of the annual catalogue) until the end of the month. I have used this for several projects and I never get sick of it.
I've intentionally left two cards blank and when the occasion to use them arises, I will add my greeting. The other is a sympathy card. The cards have a thick Whisper White base and a mat of Old Olive.
I've used a top layer of Petal Pink embossed with the Subtle 3D Embossing Folder. Three Stitched Shapes squares have been stamped with the stem from Daisy Lane in Old Olive ink and layered over each other. The daisies have two layers and have been stamped by inking with Mango Melody ink and sponging Poppy Parade ink around the edges then stamping onto Whisper White card. Each adhered with a Stampin' Dimensional.
It is hard to capture the embossing but I will show you a larger version to see if that helps
Thanks for checking out my post - I hope you are inspired to grab this bundle using the Shop Now button above, and if you already have this - maybe you've now got some new ideas to use.
Sunday, 23 February 2020
#CTC263 CASE the Colours of Kerchief Card Kit Week 2
Case the colours of the Kerchief Card Kit -
I ombre style stamped Happy Birthday from Peaceful Moments in Night of Navy down the left hand of Whisper White cardstock and embossed with the Subtles 3D TIEF. This was added to a mat of Poppy Parade and attached to the base. I've used Petal Pink, Poppy Parade and Early Espresso to cut the pieces for the flowers using the Poppy Moments dies and adhered them together, then I've cut the leaf pieces using Mossy Meadow and Pear Pizzazz, adhered them together and snipped them apart before placing where I wanted. The arrangement has been popped up with Stampin' Dimensionals.
I am seeing so much inspiration using the Peaceful Moments and Painted Poppies Bundles, I'm sure they will get a good workout in this house!
Time for you to pop over and see Michelle's creation - looks like we had similar ideas this week!
Sunday, 24 November 2019
#CTC256 Annual Catalogue Layout with a Holiday Twist
Take any layout from the Annual Catalogue and give it a Holiday Twist:
For me, it was the photo on page 116.
I CASE'd the butterfly card with a base of Night of Navy, a layer of Feels Like Frost Specialty DSP, and the top layer of Seaside Spray had Stitched Stars die cut then the piece was embossed with the Subtle 3D embossing folder as per the CASEd card. After adhering the embossed piece, the diecut stars were stuck back in place. I chose a greeting from So Many Stars stamped in Night of Navy and added using Stampin' Dimensionals opting to leave out the twine.
I carried on and CASEd the card on the left with a base of Night of Navy, two flourishes cut from Seaside Spray using Stitched Stars dies and attached to the base. I've stamped some stars onto Whisper White card using Night of Navy ink and coloured with Daffodil Delight Stampin' Blends. I've added some tiny stars stamped in Daffodil Delight, with another greeting from So Many Stars in Night of Navy. To bring in a little colour I've matted my stamped piece with Daffodil Delight and popped it onto the card with Stampin' Dimensionals again omitting the bow.
A closer view of the cute Stitched Stars dies:
Thanks for stopping by - check back soon if you would like to see what I presented when I attended the Stampin' Up local Onstage event in Perth, WA! Maybe by Tuesday, I'll have that sorted.. Meanwhile, please continue on the hop to see what our lovely Rose has created this week:
Sunday, 9 June 2019
#CTC232 Artistic Expressions
Welcome to the new catalogue! This week the crew are CASEing from the Artistic Expressions section from pages 106-159
I've chosen the shaker card on the bottom of page 114, and CASEd the layout:
I started off with a piece of Pool Party DSP, and worked out where the oval would be placed and traced it loosely with a pencil. I've sponged the lower half with Balmy Blue and the top left with So Saffron and a tiny bit of Pumpkin Pie. I've stamped the fisherman from Best Catch with Basic Gray, and used the same ink for the greeting from Perennial Birthday.
I used a piece of Basic Gray cardstock for my top layer and embossed it with the Subtle 3D EF before adhering to the stamped piece. I've used dimensionals to add all this to my base card. I've stamped and die cut a fish hook (Catch of the Day dies) then coloured with Stampin' Blends and glued to the bottom corner. The fish are diecut from a scrap of Blushing Bride, sponged a little with Balmy Blue and then had the markings stamped with Basic Gray.
For my little fish I masked off some of the spots before inking. Fun bringing my love of cardmaking together with my husband's love of fishing, so off to his box of pretties for my photo.
If you would like to join the challenge this week, simply make your card and tell us which photo you've used from the pages listed above, take a photo and add it to our Facebook page using the link over to the right. Before you go, please continue on the hop by visiting Monique:


