Showing posts with label Stitched Nested Labels dies. Show all posts

Sunday, 9 August 2020

#CTC280 CASE Aug-Dec Catalogue Cover


CASEing the cover of the August - December Mini Catalogue:
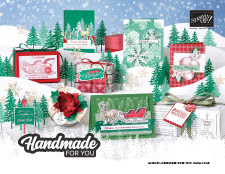

I've chosen the snowflake card top right.

Using a base of thick Whisper White cardstock, I've randomly stamped the small squares image from Tasteful Touches using Balmy Blue ink in place of the colour washed original.

Next I've diecut a piece of Balmy Blue cardstock with a Stitched Nested Labels die to form a similar frame to the one above and adhered it to the base.

I've diecut a swirly star shape with Stitched Stars dies out of the new Balmy Blue Glimmer Paper. I've also stamped some stars from So Many Stars in Balmy Blue ink onto Whisper White card and diecut them along with some Balmy Blue cardstock stars. I've stuck all the diecut stars down and added a greeting from So Many Stars, again using the same Balmy Blue ink and Whisper White cardstock, with Stampin' Dimensionals to add it to the card.


Thanks for stopping by. We hope you'll find some time to play along with the challenge this week. Post your card to our Facebook page using the link over on the right. Next on the hop we have Tina and I can't wait to see what she has created this week:

Sunday, 7 June 2020

#CTC271 CASE the New Catalogue


We are CASEing the inside of the new catalogue this week, as we couldn't share images of the inside last week, so this is Week 2 of CTC271.


I've chosen the card on the bottom right of page 44:


I've diecut a heap of Stitched Nested Labels shapes from Seaside Spray cardstock as well as one in Whisper White, and made a template to hold each blank in the Stamparatus. Next, again using the Stamparatus, I lined up the greeting from Butterfly Wishes and using Granny Apple Green stamped each of the blanks - much easier than lining up the greeting each time.

I've adhered them randomly to a full card size piece of Seaside Spray cardstock and stuck that to a thick Whisper White base.

I've diecut the top layer of the flower from Many Layered Blossoms dies in Highland Heather, and the second layer from Purple Posy, along with the leaves in Granny Apple Green. A bit of fussy cutting to narrow down to the shapes I wanted, and I glued them together with Tombow. I added a background of Bumblebee In Colour 6" x 6" DSP. Next I diecut a Whisper White circle using Layering Circles and embossed it with the Subtle 3D embossing folder then glued it onto a scallop circle of Granny Apple Green adding the floral arrangement on top.

A piece of Petal Pink Organdy Striped ribbon is tucked under the scallop and the White shape has been popped up with Stampin' Dimensionals.


We hope you're able to join us this week. Use the link over on the right and post your card to our Facebook page before next Sunday evening.

Next up is our lovely Julia and she has a stunning array of cards to show us:

Thursday, 14 May 2020

Daisy Inspiration

As you may know, I often blog with being a member of the CASEing the Catty Design Crew and we recently had the challenge of using our favourite retiring bundle. I had a few extra projects so decided I'd share them today. 

We all enjoy a  discount, so don't look past the Daisy Lane stamp set bundled with the Medium Daisy Punch (pg 23 of the annual catalogue) until the end of the month. I have used this for several projects and I never get sick of it.


I've intentionally left two cards blank and when the occasion to use them arises, I will add my greeting. The other is a sympathy card. The cards have a thick Whisper White base and a mat of Old Olive.

I've used a top layer of Petal Pink embossed with the Subtle 3D Embossing Folder. Three Stitched Shapes squares have been stamped with the stem from Daisy Lane in Old Olive ink and layered over each other. The daisies have two layers and have been stamped by inking with Mango Melody ink and sponging Poppy Parade ink around the edges then stamping onto Whisper White card. Each adhered with a Stampin' Dimensional.


This card has a Whisper White piece of cardstock embossed with the Pinewood Planks Embossing Folder which had been wiped with the Old Olive ink pad. I've cut a rectangle frame using the Rectangle Stitched dies and adhered the frame using Stampin' Dimensionals. The daisies are inked with Rococo Rose ink onto Whisper White and adhered in the corner. Two Leaf punch shapes have been roughed up a bit and stuck behind the flowers.


This card has a panel of Purple Posy which has been diecut with the Stitched Labels die that leaves a cut pattern. The greeting from Peaceful Moments was stamped with Old Olive ink. I've added a Stitched Nested Labels frame cut from Seaside Spray cardstock. The daisies have been inked with Versamark and then Purple Posy ink, covered with Clear embossing powder before being heat embossed (you can use this technique to achieve any colour embossing). One daisy has been trimmed to look more like a cone flower with the spare bit attached behind so it looks like the other daisies. Again the use of Old Olive Leaf punched shapes to finish.


It is hard to capture the embossing but I will show you a larger version to see if that helps


Thanks for checking out my post - I hope you are inspired to grab this bundle using the Shop Now button above, and if you already have this - maybe you've now got some new ideas to use.

Sunday, 3 May 2020

#CTC269 Favourite Retiring Bundle Week 1


CASE your favourite Retiring Bundle from either catalogue:


I've chosen the bundle of Daisy Lane stamp set and Medium Daisy punch on page 23. Don't panic - they are sticking around, just not as a bundle.

My daisies have been white embossed onto vellum and punched out, with two daisy shapes for each flower stuck together and then the centres were coloured with a Daffodil Delight Stampin' Blend. 

The base is Night of Navy. I have a mat of crumb cake which was embossed with the Brick & Mortar 3D Embossing folder and added to another mat of Whisper White.  The daisies have been adhered to a Seaside Spray die cut with a Stitched Nested Label die. The greeting stamped in Night of Navy is from the retiring Love What You Do stamp set. The daisies have been gently shaped with a bone folder and attached using Stampin' Dimensionals. 


I unfortunately need to send some sympathy cards and created this one with the same bundle. Onto a base of thick Whisper White I've added a mat of Old Olive embossed with the Scripty 3D Embossing Folder. A Whisper White die cut with the same Stitched Nested Label die as above has been stamped with the leaf image from Daisy Lane in Old Olive. I've inked the daisy stamp with Mango Melody ink and sponged the edge and centre with Poppy Parade ink before stamping it onto Whisper White cardstock, then punched it out. I cut a bit of a cone shape as I cut the flower into two then trimmed off a petal adhering this piece behind the first one.

My greeting is from the retiring Kindness and Compassion stamp set. As I didn't want to hide the leaves of the flower, I stamped onto a scrap of Whisper White, and then over the top of the stamped image, lining the greetings up and adhering together. The daisy has again been adhered with a Stampin' Dimensional.


We wonder what your favourite retiring bundle is? Make a card and add it to our Facebook page using the link over on the right so we can see what you chose. 

Time for you to continue on your way to Tina's stunning creation:

Sunday, 19 April 2020

#CTC267 Ornate Garden Week 2


This fortnight we are CASEing the Ornate Garden suite for #CTC267 and have been instructed to use the flowers as inspiration:

The card at the top (which was from a video on the Stampin' Up!) website inspired me:


I've used a base of thick Whisper White. My mat layer is a full card size front of Perennial Essence DSP. I've embossed with the Layered Leaves 3D Embossing Folder and gently sanded the top of the embossing to show the white core:


I've cut three Stitched Nested Labels die shapes from Soft Sea Foam cardstock and stamped the flower stalk from Daisy Lane in Pretty Peacock onto each shape then adhered them to the embossed layer. My daisies are Petal Pink ink onto Whisper White card stock, stamped twice for each flower and cut with the Medium Daisy Punch. I've coloured the centres with the Light Mango Melody Stampin' Blend and adhered using a Stampin' Dimensional. The centres have been filled with Shimmery Crystal Effects. 

The greeting from Varied Vases was stamped onto Whisper White using Pretty Peacock ink. My banner is a scrap of Soft Sea Foam which is rubbed with my bone folder to break the fibres on the cardstock and peeled the layers apart. I then rolled each end in opposite directions and stuck the greeting to it, raising it all with Stampin' Dimensionals. I felt it was all a little bit too neat and same-same,so I quickly added a Honey Bee stamped with Pretty Peacock and diecut with the Detailed Bees dies.


This angle may make the banner make more sense:


Trusting this finds you and your family bubbles safe and well. We would love you to play along with the crew this week. Just use the link over on the right to add your photo to our Facebook page. Next up please visit our lovely Kathryn and her beautiful pastel cards:

Sunday, 29 March 2020

#CTC266 CASE our Sketch for an Easter Card Week 1


In the midst of the pandemic crisis we find ourselves in - a Sunday Challenge seems the perfect distraction, so why don't you give it a go? Join the CASEing the Catty Challenge Group, answer a couple of simple questions and then add your project to our page - you'll find it all using the link over on the right and have a fortnight to add your photo. 
Create an Easter Card:

Using this Sketch:


I've chosen a base of thick Whisper White and added a panel of So Saffron cardstock which has been embossed with the Country Floral 3D EF. I've cut a piece of Whisper White cardstock using the Stitched Nested Labels Dies - increasing in length by partly cutting then shifting the die and cutting from the other end. I have then stamped and stamped off using the words from Timeless Tulips and Gorgeous Grape ink (I have actually snipped the photopolymer with my scissors so that the greeting was stand alone as Spring does not tie into Easter for us, so can't imagine me using that greeting as it was). 

Using the same die, I cut another Stitched Nested Label shape and with Garden Green ink, stamped the stalks of my tulips. Onto a scrap of Whisper White, I've used Crushed Curry and inked three tulips and punched them out with the Tulip Builder punch. I adhered the tulip heads to the stamped stalks. Onto a piece of scrap So Saffron I've used the same greeting, wrapped a piece of Whisper White Baker's Twine around and added a bow. The greeting has been added using Stampin' Dimensionals.


Kenny, our little hair bear from last week wanted to let you know he was super lucky to be able to keep his grooming appointment before we were placed in lockdown. These luxuries and many more are all on hold in New Zealand. He was also given some Easter eggs, seen above to take home to his humans. He couldn't trust himself to be in the same photo as the eggs though!!


Let's head over to Western Australia and see what Siobhan has for us this week:

Sunday, 15 March 2020

#CTC265 - 2nd Release Sale-a-Bration Week 1


CASE the second release Sale-a-Bration brochure:


My eyes rested on page 6 and the bottom card in the photo on the left:


I've used Garden Green cardstock with the same colour ink stamped the leaf image from Painted Poppies stamp set, then rotated the card and repeated the pattern. I've diecut a piece of Sahara Sand cardstock using the Stitched Nested Labels dies and with the same ink and stamps, once again used the pattern onto the diecut. 

After adhering the mat to a base of thick Very Vanilla, I've used the watercolour sheet from Peaceful Poppies Elements to colour a couple of images with my Aqua Painter, Real Red and Mossy Meadow Stampin' Markers. The diecuts are Very Vanilla cardstock and Well Written Dies. A few pearls for balance with a wash of Wink of Stella over the leaves and watercoloured images.


It was my Mother-in-Law's birthday this week, hence the card being made for her. It's a bit hard to see the Wink of Stella but it is there:


Time to pop over and visit Monique and her beautiful creation:

https://stamping-with-moni-q.blogspot.com/2020/03/ctc265-2nd-release-sab.html

Sunday, 1 March 2020

#CTC264 CASE a Card from the Mini with a Masculine Twist Wk 1


I've gone with the card on page 42 - top left:


Onto a piece of Whisper White card, I've randomly stamped the outline of the dog kennel in Early Espresso. I've reversed the colours in the cased picture and gone with a white background, then filled the kennel outlines with the block image in a mixture of Blueberry Bushel, Call Me Clover or Mango Melody. To hide a little of the white space I've added some little bone images. This was then mounted onto a Blueberry Bushel base. 

Instead of using a bow, I've cut and stacked two of the Stitched Nested Label dies, one in Blueberry Bushel and the other in Smokey slate trimming off the edge. The image was stamped in Blueberry Bushel onto the top layer and these were glued in place. I've stamped a dog in Memento Black ink adding the dots in the same colour and a Blueberry Bushel collar. The image was fussy cut and added to the top.


Don't forget you have two weeks to create your project, add to our Facebook page using the link over on the right. Please now head on over and check out Tina's fabulous project:

Sunday, 11 August 2019

#CTC241 CASE a Layout on Page 101


CASE any of these layouts on page 101:


For me, I was drawn to the Woodgrain background card on the bottom left.

I've used a base card of Smokey Slate, which has had the small image from  Daisy Lane stamped in Blueberry Bushel randomly. From Noble Peacock Specialty DSP (this is just stunning!! but hard to show how much in a photograph), I've diecut several of the Stitched Nested Labels and with some assistance from Press n Seal, I've lined them all up and attached to a piece of Smokey Slate with multipurpose liquid glue so I could still wiggle it a little into place as needed. When I was happy with the placement I trimmed the edges and matted this onto a piece of Blueberry Bushel cardstock and then onto the base using Stampin' Dimensionals.  

I've used a larger sized Stitched Nested Labels die and cut one from Whisper White and one from vellum, recutting the white piece with the same die to give a straight edge at the top and leaving the same stitching. The greeting added is from Stitched All Round and again uses Blueberry Bushel ink. I've trimmed the vellum and turned so the straight edge lined up with the straight edge of my white piece, and adhered it to the back.  

The piece of crinkled seam binding ribbon gave me the idea for some texture in my leaves. I've punched them with the Leaf punch from Garden Green cardstock. I then spritzed them with water and squished them into a ball. They were then carefully unfolded and left to dry. The cardstock soaks up the water and makes them a bit thicker but when dry very stiff and hold their shape. 

My daisy is the star of the show and the Baker's Twine ribbon finishes the CASE.


I've used the Medium Daisy punch with the matching image from Daisy Lane. I have sponged colour to the centre instead of the whole image and repeated this four times. If you look closely you will see a little notch at the end of each petal, I've just popped the very tip of the petal back into the punch, punched then repeated for every petal. The edges were sponged gently at the edges as well. For the gardeners among you, this reminded me very much of an Osteospermum and I seem to recalling one that was blue. 


This is a different angle to highlight the stunning Noble Peacock Specialty DSP


The Daisy Lane bundle is a winner in my book!  Thanks for stopping by, and please continue on to see what the rest of the crew have been up to, starting with Rebecca who just might have been called to  the same card to CASE...