Showing posts with label Well Written Dies. Show all posts

Sunday, 18 October 2020

#CTC290 CASE the Colours of Plaid Tidings DSP

CASE the Colours of Plaid Tidings DSP: Basic Black, Blackberry Bliss, Bumblebee, Cajun Craze, Cherry Cobbler, Cinnamon Cider, Crumb Cake, Mango Melody, Melon Mambo, Misty Moonlight, Pretty Peacock, Pumpkin Pie, Rich Razzleberry, Seaside Spray, Shaded Spruce, Whisper White - that's a lot of colour, but don't worry, you don’t have to use them all!


I've managed to use nine I think. I've diecut using the Well Written Dies, Shaded Spruce leaves, Melon Mambo and Blackberry Bliss flowers, Bumblebee & Pumpkin Pie butterflies and a Misty Moonlight bird. Behind each flower is a tiny square of Bumblebee cardstock. And for the butterflies I've swapped the negative pieces. I've adhered them all to a top layer of Crumb Cake which was embossed with the Old World Paper 3D Embossing Folder and matted onto Whisper White cardstock.

I've used Stampin' Dimensionals to attach this layer to my base card of Mango Melody. The greeting is from Peaceful Moments using Blackberry Bliss ink onto Bumblebee cardstock and punched with the Lovely Labels Pick a Punch. To help it to pop a little I've used the Rectangular Postage Stamp punch and Whisper White cardstock to pop behind my greeting then adhered it to the top layer. I've added some of the Flowers for Every Season gems and finished by splashing around some Wink of Stella.


As you can see, what I should have been doing was mowing the lawns, but they'll still be there tomorrow! Here's the Wink of Stella picture:


There's such a range of colours to pick from this week, hopefully you'll be inspired to play along. Make your card and post the picture to our Facebook page by next Sunday evening using the link over on the right.

Please continue on the hop to visit Julia and her gorgeous scrapbook page:
Saturday, 26 September 2020

Social Stamping - Baby


Back for the Social Stamping monthly blog hop with Kelly Kent and friends and our theme this month is 'Baby'! I can't wait to see everyone's take on this theme, but I've gone with a traditional just for baby card. If you've just visited Denise, I want to thank her for lovely intro, so nice to know I've met her in person and appreciate the kind words x

I've diecut the words Welcome and Baby; and a tiny heart using the Well Written dies from Pool Party cardstock. I've used the Layering Circles to cut a circle of So Saffron cardstock for my balloon. 

The little animals from Special Someone have been stamped onto Whisper White cardstock using Smokey Slate for the outline and So Saffron for the body colour. I've made a mask from scrap paper and popped it over the raccoon before stamping the squirrel. Prior to adhering the balloon, I used Smokey Slate to stamp the string the raccoon is holding. I've also sponged around the edge of the balloon with Smokey Slate to give it a little depth with a little heavier colour on the left. After adhering the words I've added a bit of highlight to the right of the balloon using the Chalk Pen.

My top layer has been added to a mat of Pool Party and adhered to a thick Whisper White card base. The little heart is a gift from the little squirrel.


Thanks again to Kelly for hosting us and thank you for stopping by. Please carry on over to see what the lovely Sheila has created for us this month:


If you get lost along the way, click here to take you to the main page and a full list of participants.

Sunday, 15 March 2020

#CTC265 - 2nd Release Sale-a-Bration Week 1


CASE the second release Sale-a-Bration brochure:


My eyes rested on page 6 and the bottom card in the photo on the left:


I've used Garden Green cardstock with the same colour ink stamped the leaf image from Painted Poppies stamp set, then rotated the card and repeated the pattern. I've diecut a piece of Sahara Sand cardstock using the Stitched Nested Labels dies and with the same ink and stamps, once again used the pattern onto the diecut. 

After adhering the mat to a base of thick Very Vanilla, I've used the watercolour sheet from Peaceful Poppies Elements to colour a couple of images with my Aqua Painter, Real Red and Mossy Meadow Stampin' Markers. The diecuts are Very Vanilla cardstock and Well Written Dies. A few pearls for balance with a wash of Wink of Stella over the leaves and watercoloured images.


It was my Mother-in-Law's birthday this week, hence the card being made for her. It's a bit hard to see the Wink of Stella but it is there:


Time to pop over and visit Monique and her beautiful creation:

https://stamping-with-moni-q.blogspot.com/2020/03/ctc265-2nd-release-sab.html

Wednesday, 27 November 2019

#Onstage2019 - Country Club Suite Part 2

Thanks for popping back for the next of my #Onstage2019 Perth, WA summary posts.

This time, I definitely went with a card that takes a little more patience. It is called the Floating Frame technique and there are loads of tutorials online if you need more detail. I've created a background mainly using the image of the golf ball on the tee, colouring with the same Stampin' marker direct to rubber and choosing bold colours of Real Red, Pacific Point and Daffodil Delight. I've also diecut these colours using the 'tee' from the Golf Club dies.

Here's a tip, the 1" Circle punch, will cut the golf ball off the design so you don't have to have the tee and grass if you don't want. Some of my design used that idea, but you can't really tell. I've used the Glad Press n Seal to hold my design in place, diecut with the Stitched Rectangle dies. Stampin' Dimensionals were added to the back and all was adhered in place. In the gaps I've diecut some of the little mini embossed Golf balls from the same dies and used them to fill in my gaps. I've also used Silver Foil to die cut the Golf Clubs on the left. These dies are the cutest! 

I've heat embossed greetings for both cards with the Happy Birthday from Clubhouse in Black embossing powder, and the banner is also in the Golf Club dies to cut it out with.

The card on the right uses the inside of the frame and I've matted it with another Stitched Rectangle diecut from Whisper White. Again, filling the blanks with those little golfballs.


On the insides - the same image, but without being diecut:

My next project was a pop up box card which I haven't made in a while, but should do more often as it was a lot of fun.

My base is Garden Green and I've added Country Club DSP to the panels, there's a bit of everything here; Stamping, Colouring with Stampin' Blends, Fussy Cutting, Diecutting,


The only thing is they can be a bit tricky to photograph, so this just shows the other side:


And the back is where I would usually write my greeting, so it is fairly plain, just a stamp and some of the images diecut from one of the Country Club DSP sheets.


These cards are made using the Fluid 100 Watercolor Paper - it is just gorgeous to use, and Pigment Sprinkles. The card on the left was made by spritzing both sides with water and then tapping on some of the sprinkles. Then I've spritzed some more and left the colour to blend itself. When dry I've stamped the golfer image with Memento Black ink. The base is Basic Black, with a mat of Whisper White.  Greeting from Well Written dies in Basic Black.

The card on the right I spritzed on the back and then only wet up to half way before adding pigment sprinkles. I then dried it with my heat gun and applied colour to the top. I actually rinsed this off and redid it so many times as I wanted to get a sky blue shade. You will not believe how tolerant this watercolor paper is! I literally ran it under the tap at one stage and it didn't lose any of its strength. 100% cotton paper! Amazing! Both these cards were made from one sheet of Watercolor paper by the way.Again, when I achieved my desired colour, it was left to dry and the golfer was stamped with Memento Black ink. Same greeting from Well Written dies.


Today's photo is another one of the lovely CASEing the Catty team members, Kathryn. Unfortunately we weren't that organised and although there were other team members in Perth - we didn't manage to get a photo of us all.

Sunday, 2 June 2019

#CTC231 CASE Anything


There's never been a better time for you to play along - the crew have an open slate this week - CASE Anything! Use the link over on the right to pop your photo on our page - it's that simple.

Image may contain: indoor

I've chosen to CASE the layout on page 120...


...and make it into a scrapbook page! I have quite a large pile of photos waiting to be scrapped, so I'm feeling a little smug that I've finally made a start with this page. 

I love to use more than one photo in my page so I think CASEing some more of these full page layouts will work well for me. I like capturing different expressions and energy, so have added as many as I could, with less emphasis on the embellishments. I've changed a few elements of the CASEd page, but you get the idea. My base was Fresh Fig cardstock. I've punched Wood Textures DSP with the Tailored Tag punch and adhered them where the palm leaf is in the photo.


In place of the orchids in the layout above, I've gone with the magnolias everyone is loving from the new catalogue. I've fussy cut the Magnolia Lane DSP and placed them where they wouldn't interfere with the photos. My greeting is diecut with Well Written dies. You're probably thinking you don't remember seeing those words - and that would be correct. I've die cut a few words from Whisper White cardstock, then selected the letters I wanted and joined them back up again. To help hide the joins, I've used the Inlaid Embossing technique - where you stick your greeting to your cardstock (good old Press and Seal to help line it all up) and then run the whole piece through your Big Shot in an embossing folder, I've used my Subtle folder here. The same colours were used for matting the photos - Blushing Bride and Garden Green.


I love the concentration - pretty sure the task put her off gardening though, can't say I've seen her out there watering too often since!


Thanks for stopping by. It's time now to pop over and check out Shannon's cute project:

Sunday, 21 April 2019

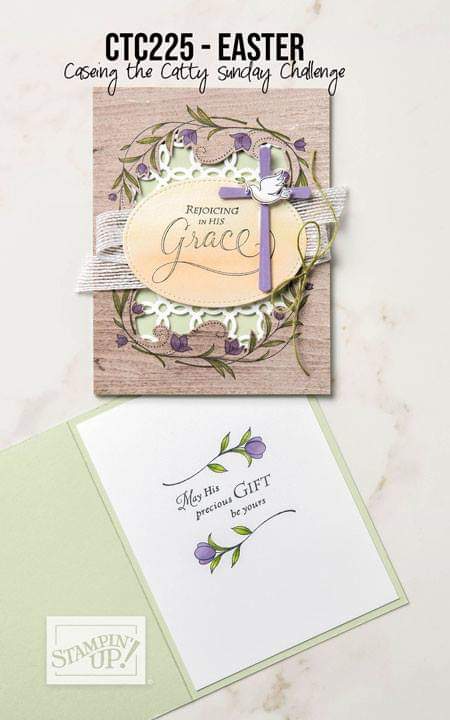
#CTC225 - Easter


I trust you are enjoying a relaxing long weekend whilst remembering the reason for the season. This week the crew are CASEing anything Easter.


I have gone with the bunny theme Easter often represents but as I look at it again it - it could be a farmer's worst nightmare, especially where we are currently holidaying in the beautiful Central Otago area where these critters are notoriously unpopular.

I have used the stamp sets Best Bunny and Perfectly Paired and the masking technique. I used my Stamparatus and Early Espresso marker to get the boat and cabin in position on Whisper White card, with Bermuda Bay for the waves, then masked the boat to add the bunnies.

Stampin' Blends for colouring and a couple of clouds fussy cut and popped up with dimensionals. I used a scrap of Pool Party and Labeller Alphabet for 'Easter' with 'happy' die cut from Well Written thinlits and Early Espresso cardstock. This was attached to a mat of Early Espresso onto a Pool Party base.


Have you made an Easter card and would like to join the challenge?  Post it to our Facebook page using the link over to the right. Now please go visit my lovely friend Julia and her stunning project