Showing posts with label Peony Dies. Show all posts

Sunday, 10 April 2022

#CTC364 Easter


CASE an Easter card:


I've gone to Page 77 of the January-June Mini Catalogue:


The base card is Misty Moonlight which will retire soon. The top layer is also Misty Moonlight and I've used the same background stamp as the CASE card to stamp the image three times from Daffodil Daydream using Black Memento ink then added it to the base card.

The Peony dies were used to cut the portions of the flower from Basic White and the leaves from Granny Apple Green and Old Olive. I've embossed the flower parts with the Bark 3D Embossing folder for a bit more texture. 

The greeting is diecut using Amazing Thanks Dies in Basic White and Basic Black then adhering together and adding to the card using Stampin' Dimensionals. All rounded off with a few Rhinestone Basic Jewels.


The Peony Dies will also retire soon, the greeting dies are sticking around a bit longer.


We hope you will find some time to join the crew this week, whether you make a card for Easter or just use an Easter card as your inspiration. Post it to our Facebook page using the link over on the right before next Sunday evening.

Next on the hope we have our amazing friend Tina:

Sunday, 20 February 2022

#CTC357 SAB Pg 6 Sketch


We are CASEing the Sketch top right of Page 6.

Here's the simplified sketch:

I cut a panel of Daffodil Delight the width of my card and a panel of the script from Vellum Layering Designs a little longer and adhered by sticking it to the back of the panel and wrapping it tightly around and then adhering the other edge so the sides are basically open but I didn't want to worry about adhesive showing through the vellum.

I've cut two strips of Mango Melody and diecut with the edging die from Peony dies then glued these behind the panel and attached it all to my base card. Next I've diecut a shape with the Tasteful Labels dies out of Smokey Slate cardstock and embossed it with Timeworn Type 3D Embossing folder and popped that lower on the panel. The Daffodil was pieced together using Daffodil Dies, Daffodil Delight, Mango Melody and Old Olive Cardstock. 

I've stamped the greeting from Blessings of Home in Night of Navy ink onto Basic white and popped one end against the edge of my card and stuck the other just under my daffodil stem. To finish I've used the little self adhesive Brushed Brass Butterflies.


Playing with some of the product from the new mini catalogue.


We look forward to seeing your take on the sketch and posting the photo to our Facebook page using the link over on the right. Just a few simple questions to join the group first, answer them and you're all set. 

Next up we have Kathryn and her cute card:

Sunday, 30 January 2022

#CTC354 CASE Abstract Beauty Suite


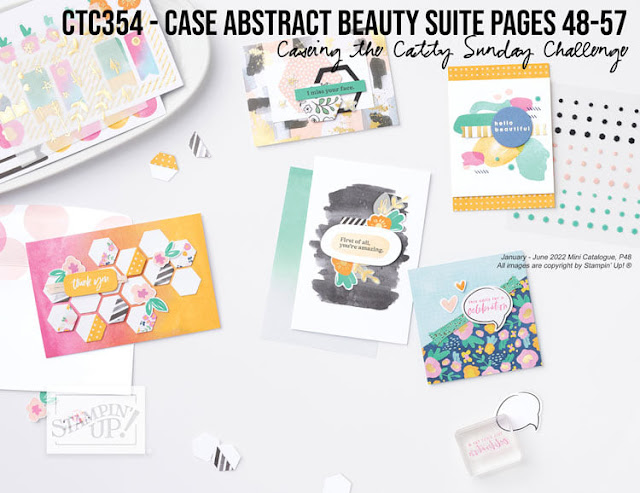
CASE the Abstract Beauty Suite on pages 48-57 of the January-June Mini Catalogue:

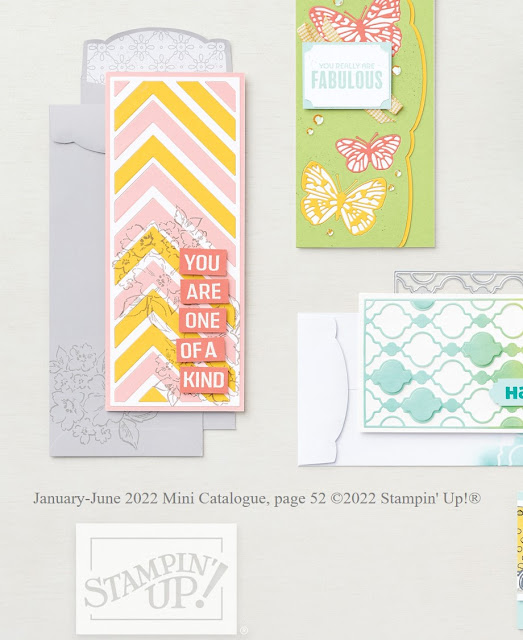
I've chosen the Slimline Butterfly card on Page 52:


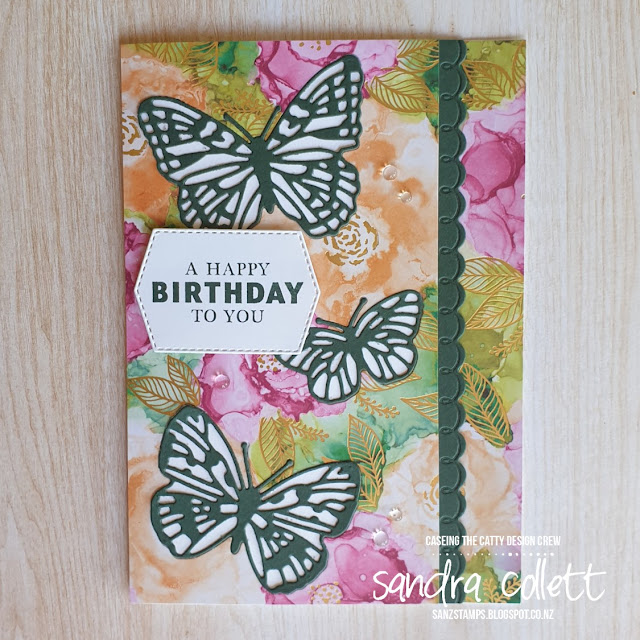
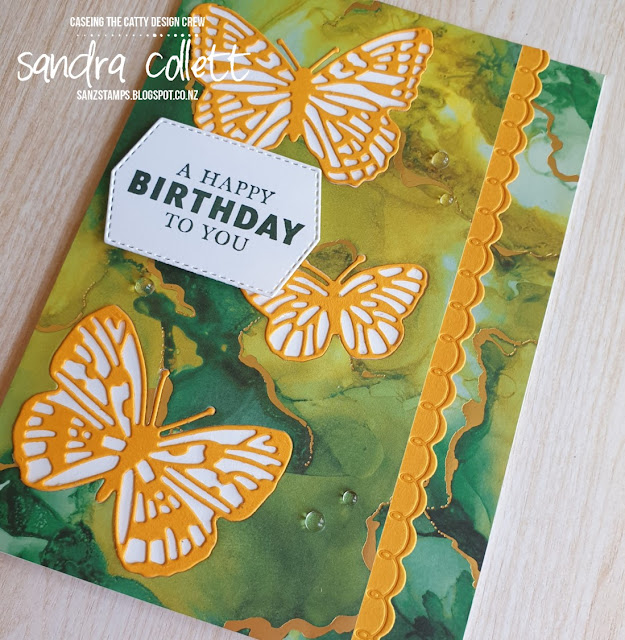
I didn't make a Slimline card though, just my usual half A4 but I used this picture for inspiration. I've started with a base of Thick Basic White and cut a piece of Expressions in Ink Specialty DSP to the full size of the card. I've then sliced it 3/4" from the side and taken the same amount off the front of the card base. 

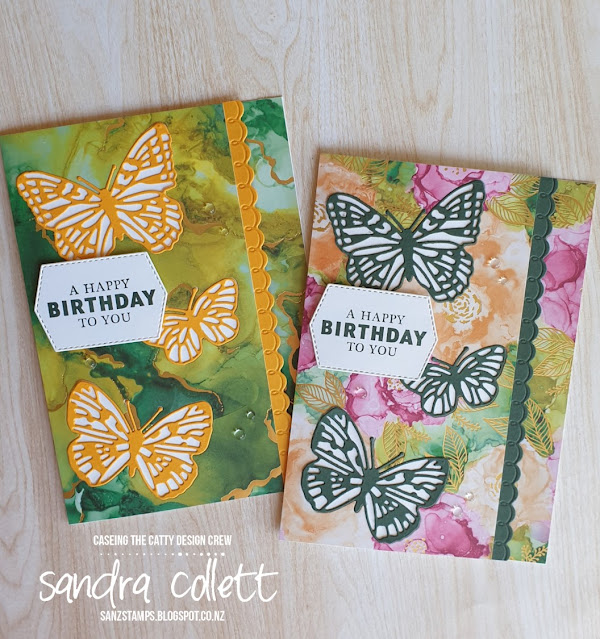
I've cut three butterflies out of the DSP using the Brilliant Wings Dies and popped them aside for another project. I've used the CASE card idea of a contrasting edging and cut a piece of Evening Evergreen cardstock with the edging from Peony Dies. I've adhered the edge to the DSP and then attached the DSP panel to the front of the card. The 3/4" of DSP has been added to the inside edge of the card so it looks like it's all one. I've diecut the same three butterflies out of Evening Evergreen cardstock and adhered them into the blanks on the front of the card. The greeting is from Handsomely Suited and stamped in Evening Evergreen ink onto Basic White cardstock then diecut with a Tasteful Labels die and attached it to the card with Stampin' Dimensionals.


I've added some (retired) Flowers for Every Season gems to finish.


At the time I couldn't decide which piece of DSP I wanted to use, so ended up making two cards.


This time the contrast colour was Mango Melody but I have kept with the Evening Evergreen greeting.


I can't decide if I've a favourite or not - I keep going from one to the other but they both look so pretty with the gold shimmering in the background. Let me know which one you prefer.


We hope you'll join us CASEing the Catty this week. Post your project to our Facebook page using the link over on the right before next Sunday evening. Winner announced Monday evening.

Next on the hop we have the lovely Rebecca and her fun Black & White with a pop of colour card!

Sunday, 26 July 2020

#CTC278 CASE your Favourite 2020-21 Annual Catty Project


Pretty much open book this week from the annual catalogue!


For me - the Peonies have been calling and I stopped at page 82 top left...


After I chose my card, I wanted to swap the colours out, inspired by peonies that I grow in my garden, although they are only just thinking about appearing, I hope they don't get too excited until the frost danger has passed.

I started by die cutting the pieces for the peony flower and leaves from Whisper White using the.Peony dies. I then used So Saffron and Flirty Flamingo in that order to wash colour onto the pieces for the flower without going over them too much or being too fussy. While they were still a little damp I popped them into the Old World Paper 3D embossing folder and used a bit of tissue over the top to help absorb any moisture before running them through my embossing machine. Instant texture! (I used this once before, but did have to be careful as without misting the feature layer can tear easily)

I then coloured the leaf pieces in the same way with my Old Olive ink pad and when dry adhered them in order. Then I placed them behind the flower and glued them in place.

I've used So Saffron cardstock as a base card and stamped off the large peony flower from the Prized Peony stamp set with Gray Granite ink around the card as per the original CASE card. I've cut a piece of Peony Garden DSP but reversed the colours from the CASE. I chose one with a lot of white in the background. Next I cut a piece of Gray Granite cardstock with the Painted Labels dies. It was smaller than I wanted, so I had to bring in the trick of cutting over the edge of the board and then realigning for the other side, a little bit of fuss for a shape that suited me.

I've heat embossed the birthday greeting from Peaceful Moments onto Old Olive cardstock with White embossing powder and trimmed it to fit the width of my DSP. I've also diecut an edging from Gray Granite using the Peony dies border and adhered behind the bottom of the greeting.


The texture is hard to capture by photo however, after placing the flower, leaves and greeting on Stampin' Dimensionals - you will have to trust me, it's there!.


Here's my inspo... I grow other colours, but these were the closest.


Love to see your favourite project from the catalogue, feel free to add it to our Facebook page using the link over on the right. Meanwhile, please visit Judy to see what I'm sure will be another fabulous creation!