Showing posts with label Lovely You. Show all posts

Sunday, 13 March 2022

#CTC360 CASE a Masking Project


CASE a Masking Project from either catalogue:


I've chosen the image on the left of Page 26:

I used a page from a telephone directory to tear my edging and held a piece of Basic White cardstock in place with washi tape then added my masking over the top with more washi tape. Using the Blender Brush I used first Daffodil Delight, then Bumblebee finishing with Calypso Coral to create the background.

The Lovely You images are stamped with Soft Succulent ink. I randomly stamped the patterns, with one of the patterns being stamped twice to make it a little darker. I didn't like the gold embossed image I chose so swapped it out for two pieces of foliage diecut with the Meadow Dies from Soft Succulent and Evening Evergreen cardstock. 

The base card is Evening Evergreen and the DSP used is Tidings of Christmas.The greeting stamped in Soft Succulent from So Lovely was diecut with a Meadow Die and added over the stems with Stampin' Dimensionals.


We hope you get the chance to join the challenge this week. Mask up and show us what you create using the link over on the right before next Sunday evening.

Next up we have Michelle with a little bit of monkey business:


Sunday, 17 January 2021

#CTC301 CASE a Sale-a-bration Project


CASE any project from the Sale-a-bration catalogue

I've chosen the image in the middle of Page 11:


Onto a base of Soft Sea Foam, I've attached a panel of In Good Taste DSP. Next I've fussy cut flowers from a sheet of Paper Blooms DSP and adhered them randomly leaving a gap for my greeting.

I've stamped a greeting from Lovely You in Night of Navy onto Whisper White cardstock using the Lovely Labels Pick a Punch to get the right size and matted it using Night of Navy and the same punch. To finish I've added some of the green Flowers for Every Season Gems.


This was an easily replicated card and while I still had spare fussy cutting on my workspace, I decided to make another card. This time I chose one big flower and adhered the stem to the greeting and trimmed off so no white showed on the left of the stem. I've added mini Stampin' Dimensionals to the back of the flower and greeting and stuck it onto the panel The clear Flowers for Every Season Gems were the finishing touch ... just because!


The crew would love to see you play along, use the link over on the right to add your picture to our Facebook Challenge page before next Sunday evening.

Next up, please hop over to our friend Julia and see what she has to share this week:

Sunday, 4 October 2020

#CTC288 CASE a Kit Card/Project from Either Catty


CASEing the Kit Card/Project from either catalogue this week:


I've chosen the image on the bottom far right.

I've embossed Whisper White cardstock with the Absolutely Argyle 3D Embossing folder, having spritzed lightly with water to make it not crack.

After adding that to a base card of thick Whisper White, I've punched the Red Velvet Paper with the Vases Builder Punch and selected some of the Forever Gold Laser-Cut Specialty Paper images to use as my foliage. A tiny strip of In Good Taste DSP was my shelf and the greeting was from Lovely You using Night of Navy onto Whisper White and cutting the banner. Everything was adhered using my multi purpose glue


I love it, but wish you could see the texture, so here's another angle:


Next on the hop we have Judy!!

Sunday, 13 September 2020

#CTC285 CASE the Layout on Page 29 Mini


The crew are CASEing the layout on page 29 of the August-December Catalogue:


This is the sketch if you can't cope with a photo:

I looked at the picture and saw black and white as the central image, with strips of cardstock (or similar) behind. I also rotated the image to fit the picture that jumped to mind.

I've started with a base card of Petal Pink cardstock and used 3/4" strips of Soft Sea Foam, Feels Like Frost Specialty DSP, Whisper White and Mossy Meadow. The Feels Like Frost has a piece using both sides for variety. As you know I've enjoyed using my new Lovely Labels Pick a Punch and have taken advantage of that shape for each end of all of my strips. The Whisper White was stamped with a Lovely You greeting in Memento black before being popped into place.

My main image is the Good Morning Magnolia flower coloured very lightly with Stampin' Blends so as not to detract from the Black and White image that I was drawn to. After colouring it was added using Stampin' Dimensionals.


The crew would love to see you play along using the link over on the right. Next up we have Lauren:


Tuesday, 11 August 2020

Box of Sunshine Alternative Ideas

WOW - Stampin' Up! have knocked it out of the park with this gorgeous all inclusive Box of Sunshine! It has everything; card bases, stamps, black ink spot, diecut elements, stickers, adhesive sequins, glue dots, dimensionals and the most stunning gold foil envelopes (the only thing you need is a block for the photopolymer stamps)The intention is that you use the kit you have purchased and then repurpose the box to gift to someone and maybe it will continue on for a while. 

I'm not here to show you the cards in the kit, I've got some unique alternatives using some extra cardstock and tools you may have. Here is the box redecorated with the address stickers provided:

The fine lines you can see around the elements is gold foil. Lemons and pineapple feature along with the sun and leaves. 

I might regift this box with something like this.

Chocolate, tea bags, tissues and a handmade project can be wrapped inside the tissue included in your box.

I used Daffodil Delight for my project, with Shaded Spruce embossed with Pinewood Planks and a few of the diecut elements.  On the inside - Lemsip!

Next I've made some cards. Using the Flowers for Every Seasons Memories & More Cards & Envelopes. I've cut one of the foil envelopes and trimmed the dotted sticker to the same height. I've cut a strip of Shaded Spruce cardstock to become my stem and adhered the sunflower at one end and leaves at the other, popping it all on with dimensionals. The greeting is Lovely You punched with the Lovely Labels Pick a Punch.

Inside a cheery envelope:

I've used a Basic Black card base and diecut the back layer out of a card from the kit with Many Layered Blossoms dies. I've adhered Adhesive Sheet to the back of Whisper White and cut the top layer then stuck the two layers together. I've popped mini dimensionals on the back to place it on the card. 

Inside the tiny flowers from the same die set:

With one of the other swirly patterned cards, I've managed to diecut five poppies and stamens using the Poppy Moments dies along with leaves from Granny Apple Green, Shaded Spruce and Basic Black.The black and white dotted background and frame are self adhesive.

A little more inside love using Painted Poppies and the adhesive elements:

The fifth poppy became a gift tag (or bookmark) using part of a gold and white striped card:

A pocket card from a quarter sheet of Daffodil Delight cardstock and the other half of the envelope above. Greeting is stamped in Basic Black and then again in Mango Melody a smidge over. I've chopped a piece out of the pineapple as it wasn't going to be seen and stuck the rest of it and the envelope to the card. I've used the white half of the piece I diecut the poppies from and folded it to create the card for the pocket. 

Card decorated with elements from the kit, utilising the piece of pineapple from the base and finished with the adhesive sequins.

Seriously, I still have loads of elements left to create with, but I hope these ideas inspire you to try something else with your kit and spread some sunshine. 

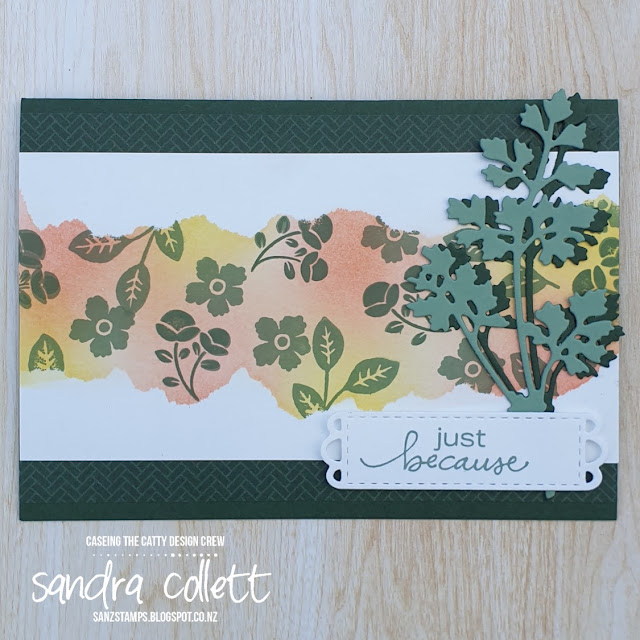
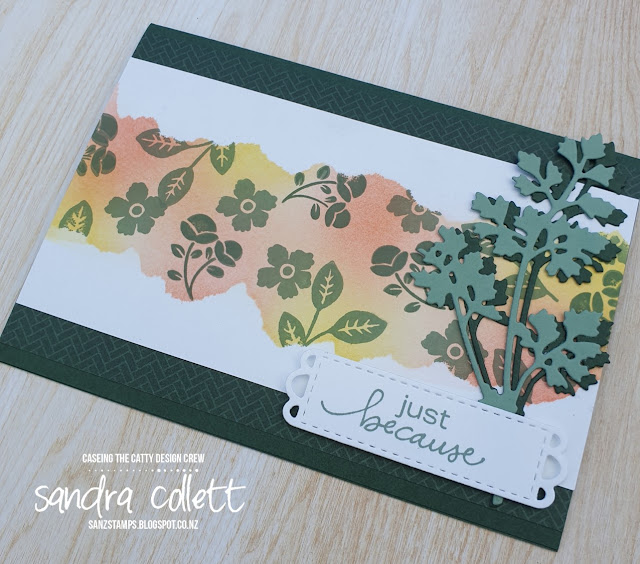
How about some fussy cutting after the elements have been removed and adhering the pieces to cardstock. Leave them as is or for some texture try embossing with Old World Paper 3D Embossing Folder. This is a fun card to pop into a care package I'll send to my daughter closer to exam time. The gold frame is from the adhesive sheet for decorating the box:


Hopefully it will make her:


Thanks for stopping by 😊