Showing posts with label Hand-Penned DSP. Show all posts

Sunday, 17 April 2022

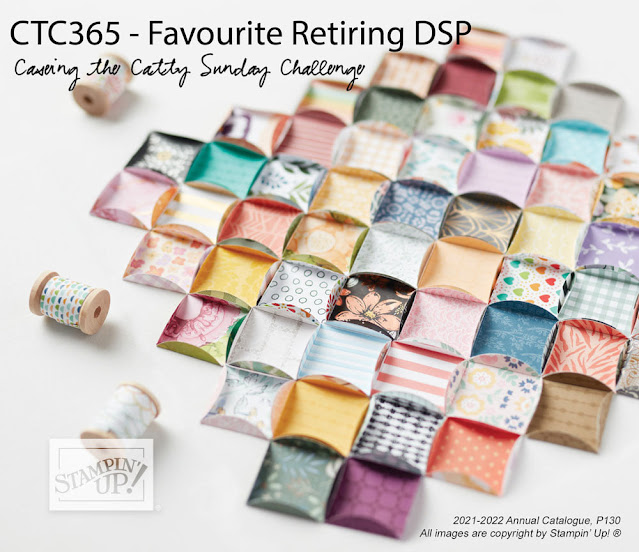
#CTC365 Favourite Retiring DSP


Happy Easter everyone!!. Today we are CASEing our Favourite Retiring DSP


I wanted to find a card that showed off the DSP and settled on the card on the far left of Page 60:


Onto a base of Thick Basic White, I've added a full size layer of Hand-Penned DSP. I've used another pattern from the same DSP and punched four daisies with the Medium Daisy punch. I've sponged the ends with Highland Heather ink and attached them together in pairs. 

The greeting from Handsomely Suited was stamped in Highland Heather on the bottom left of a panel of Basic White cardstock and a third pattern from Hand-Penned DSP added at the top The panel was attached using Stamin' Dimensionals. I've finished by adding Fine Tip Glue to the middle of the daisies and when setting poking them a bit to give texture.


Hard choice this week as there are quite a few of the Designer Series Papers I had grown fond of that won't be available soon.


Hopefully you'll find a card to CASE and let us know what you're favourite retiring DSP is. You can use the link over on the right to find our Facebook page to post your photo.

Next on the hop we're off to Queensland and our talented friend Julia:

Sunday, 3 April 2022

#CTC363 CASE Favourite Retiring Bundle


CASE your Favourite Retiring Bundle


Always a sad time of the year seeing what won't appear in the next catalogue but mixed with a touch of happy at the lovely new products you'll see in a month.

I've CASEd the Many Layered Blossoms bundle card on Page 158:


This challenge coincided with the need for a Sympathy Card. I started with a base card of Thick Basic White and changed the stencilled background to an embossed layer of Basic White using the Bark 3D Embossing Folder.

The flower layer was made using Highland Heather from the thicker Many Layered Blossoms dies. The top layer was Basic White with Adhesive sheet adhered to the back of it, makes it much easier to match up and attach the two sections together. I then lay all this onto a piece of Hand-Penned DSP and fussy cut so that it filled in as the background without any extra showing. 

The greeting from Blossoms in Bloom was stamped in Highland Heather onto a diecut from my spares box and I tucked one end in behind a flower.


The Highland Heather centres of each flower have been touched up using Wink of Stella. 


I think I'll have to hang onto this set for just a bit longer. 

What is your favourite retiring bundle? Maybe you'll join us with the challenge this week. Make a card using it or CASEing it before next Sunday evening and add it to our Facebook page.

Next up we have our friend Julia and some more of her fabulous scrapbooking:

Sunday, 6 March 2022

#CTC359 CASE a Die Project


 CASE a Die Project from either of the current catalogues:

I've loosely used the card at the top of page 16 of the Mini Catalogue:


Loosely as in I saw red tulips and the need to make a special card for an 80th birthday for someone who likes the colour red. That's when I veered away from the original CASE card.

Using the Tulips Dies, I've diecut multiple pieces of tulip petals from Real Red cardstock and pieced them together in as many different ways as I could think of. Here's an idea of the pieces I used to make, some may be the same, but most of them are different, by folding one left over right and another right over left, or by using a wide insert, or a narrow insert or a couple of narrows. So many options:


I've sponged edges and tops with Cherry Cobbler ink and a sponge then pieced a stem, using both thicknesses to each of the flowers. I've diecut multiple stems and leaves using Garden Green cardstock.

I've then created a Pop Up Box card using a piece of Basic Black cardstock, the full width of A4 by 6" in length. I chose two sheets of Hand-Penned DSP for the background and adhered them to the base card. I pieced the tulips to the black inserts before I stuck the inserts inside the box so I could fiddle with the placement. 


I've tied Whisper White Crinkled Seam Binding Ribbon around the front flap and added a double bow. I've used the (retired) Large Numbers for the Basic Black and Real Red numbers and adhered them together slightly offset then added these to the front flap. .


The Basic Black butterfly was cut with the Brilliant Wing dies and adhered over a piece of Real Red cardstock and fussy cut around as the co-ordinating blank die left a red border around the butterfly which I didn't want. I've popped that onto the card with Stampin' Dimensionals.

The edging was made using a strip of Garden Green cardstock A4 width and diecutting the edge then lining it up again and diecutting the rest of the width. I then adhered some Adhesive sheet to the back of a strip of A4 cardstock the same width and ran this through the same way. I then snipped off all the stems and sponged with Cherry Cobbler ink, removed the backing from the adhesive sheet and stuck my flowers onto their stems:


This strip was then attached to the lower edge of the card and wrapped around to the back where the ends are hidden by my greeting panel.


The Happiest of Birthdays was used for the greeting, stamped in Garden Green ink onto a panel of Basic White with another tulip added to finish.


It's not needed until Wednesday so the pressure is off a little now, and it won't be being posted, so I just need to make the envelope. Hope my mother-in-law appreciates the effort involved. I've adhered post it note strips to the back of the numbers, so at a later date she can remove the numbers and have an everlasting bouquet for her dresser.

We would love to see you CASE a Die Project and add it to our Facebook page using the link over to the right before next Sunday evening.

Next on the hop we have Michelle and her fabulous Mother's Day card: 

Sunday, 31 October 2021

#CTC342 CASE Favourite Mini Catalogue Project


CASE our 
Favourite July - December Mini Catalogue Project

The bottom card on Page 56 attracted me


Onto a base of Mossy Meadow, I've added a distressed piece of Hand-Penned DSP. Seems I accidentally rotated my piece but it still works - thankfully it didn't have script on it like the CASE card. 

I've stamped the poppies image from Pleasant Poppies in Early Espresson ink onto Basic White and diecut using a Layering Circles die. I've coloured the image with Daffodil Delight, Mango Melody and Pumpkin Pie Stampin' Blends and attached that to the DSP.

I've used Mossy Meadow ink with Many Messages in the area I wanted to diecut using the Messages die. I've added a Baker's Twine bow behind the greeting and popped it on the card using Stampin' Dimensionals.


This is a super simple to create and easy to change out the theme or reason to send.


We look forward to seeing what you create. Just pop your picture on our Facebook page using the link over on the right.

Next up we have our lovely friend Julia and I'm excited to see more of her exciting projectthis week

Sunday, 1 August 2021

#CTC329 CASE Mini Catalogue Cover


CASE the Cover of the New Mini Catalogue


I used the image in the centre and rotated it 180 degrees for my layout inspiration.

Onto a base of Soft Suede cardstock, I've added a faux ribbon using a strip of Highland Heather cardstock mounted onto a strip of Basic White. The Hand-Penned DSP was used to diecut with a Tasteful Labels die, but only to half the width of the die, then the other half was cut from the far end of the DSP to give an elongated diecut. This was repeated with a shorter piece of Soft Sea Foam cardstock for the next layer. Another piece of Hand-Penned DSP with another Tasteful Labels die, and the final layer was diecut from the same set after stamping the greeting from Handsomely Suited in Soft Suede ink onto Basic White cardstock.

The flowers, in Pale Papaya, leaves in Garden Green and bow in Highland Heather and Basic White were diecut using the Pierced Blooms Dies and roughly adhered to replicate the original.


I've finished by adding a knot around the bow with White Baker's Twine and a few of the tiny flowers from the scraps on my bench.


Do be sure to check out all the other ideas from the crew - amazing diversity in projects! We look forward to seeing your creation - be sure to add it to our Facebook page using the link over on the right. Next on the hop is the lovely Judy: